Logging
The system information about Elcomsoft Phone Viewer work is logged into EVP.log file, which is located at:
oWindows: %AppData%\Elcomsoft\Elcomsoft Phone Viewer\EPV.log
omacOS: ~/Users/<username>/Library/Application Support/Elcomsoft/Elcomsoft Phone Viewer/EPV.log
If you are experiencing any problems with Elcomsoft Phone Viewer, please create the ticket in our online support system (see Contacting us for details), providing us with the log file mentioned above.
The amount of information that is written to the EPV.log file is defined by the level of logging. The higher the level, the more detailed information is written to the log file, but it may affect the program and overall system performance. By default, a medium level of logging is set. To change the level of logging (if requested), please do the following:
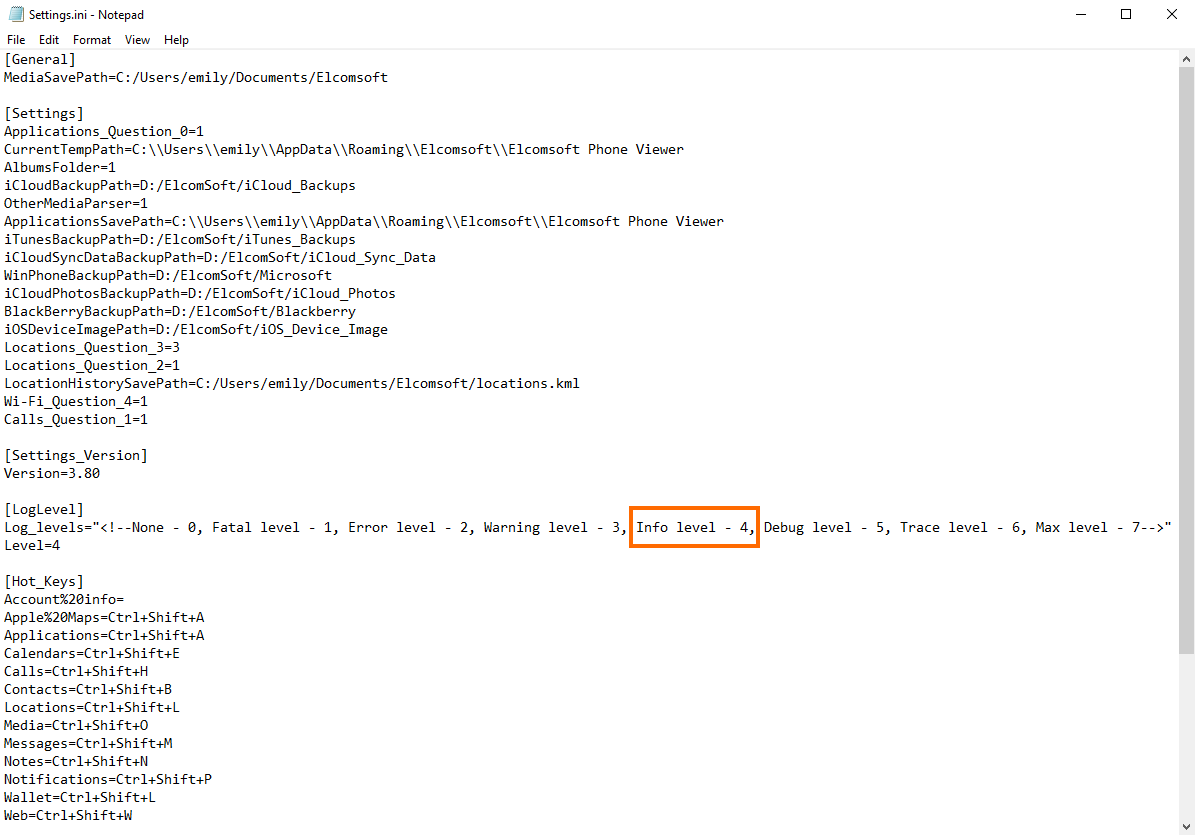
1.Open the Settings.ini file that is created when you start the program for the first time. The file is located:
oWindows: %AppData%\Elcomsoft\Elcomsoft Phone Viewer\Settings.ini
omacOS: ~/Users/<username>/Library/Application Support/Elcomsoft/Elcomsoft Phone Viewer/Settings.ini
2.Define the necessary level of logging in the Level parameter. The following levels of logging are available:
0 - No logging is performed
1 - The information about fatal errors only is written in the log
2 - The information about program errors is written in the log as well
3 - The information about the program malfunctioning at the warning level is logged
4 - The program system messages at the information level are logged
5 - The level of logging that is necessary for debugging
6 - The Trace level of logging
7 - All information about the program work is logged. This level is the most informative, so please set logging to this level when reproducing the problem with EPV application
3. Close the file and restart EPV to apply changes.
The Wi-Fi location data and locations for other media except for camera roll are saved to the cache database: <system_disk>:\ProgramData\Elcomsoft\Elcomsoft Phone Viewer\epv_cache.db
Issues with access to the default iTunes backups folder
On macOS 10.14 or higher, if you try to access the default iTunes backup folder, you might be displayed the following message: "EPV has no access to the default iTunes backups folder. Please grant the Full Disk Access permission to EPV. For details, see Troubleshooting in Help." This happens because macOS protects iTunes backups to ensure rogue apps cannot access the personal data.
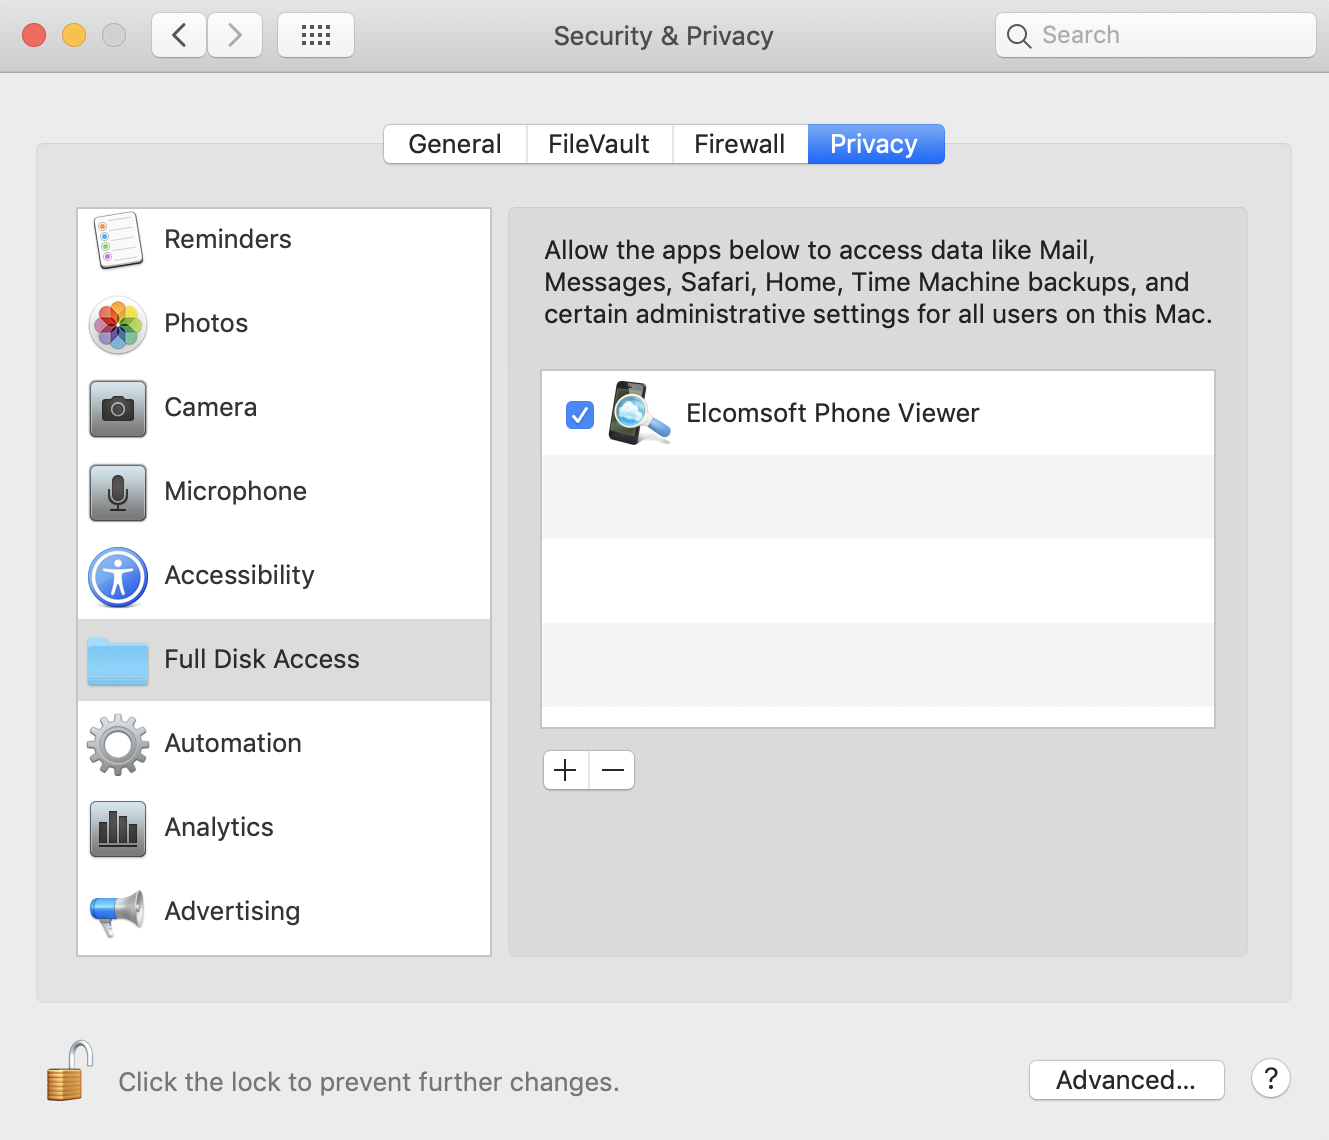
To grant the Full Disk Access permission to EPV, do the following:
1. On the Apple menu, click System Preferences.
2. Click Security & Privacy.
3. On the Privacy tab, click the Lock icon in the lower-right corner and enter your administrator password, if asked.
4. In the list of permissions, select Full Disk Access.
5. In the list of apps, select the Elcomsoft Phone Viewer check box. If it is not in the list, click the Plus icon and navigate to the Elcomsoft Phone Viewer application.
6. The Full Disk Access permission is granted to EPV.